The Classroom Learner Guide is intended for learners who are taking online courses and use Constructor Classroom to participate in online lectures, meetings, conferences or classes.
TABLE OF CONTENTS
- Step 1. Sign up/Sign in
- Step 2. Go to the Rooms interface
- Step 3. Create permanent room
- Step 4. Use a link in your calendar event
- Step 5. Manage the room
- Step 6. Join the meeting
- Step 7. Set up conference environment before the meeting
- Step 8. Enter the meeting
- Step 9. Document and screen sharing
- Step 10. Record the meeting
- Step 11. Reactions and raise a hand
- Step 12. Manage participants
- Step 13. Audience attention statistic data
- Step 14. Settings and background
- Step 15. Stop record and leave
- Step 16. Recordings
- Step 17. Video
Step 1. Sign up/Sign in
To get access to the Classroom you need to sign up or sign in in the Constructor Platform. To do this:
- Go to the https://training.constructor.app/ to enter the platform.
- Log in with your Constructor account or via email and password.
Note: If you do not have an account, please, ask your support team to generate it and register in the Constructor platform.


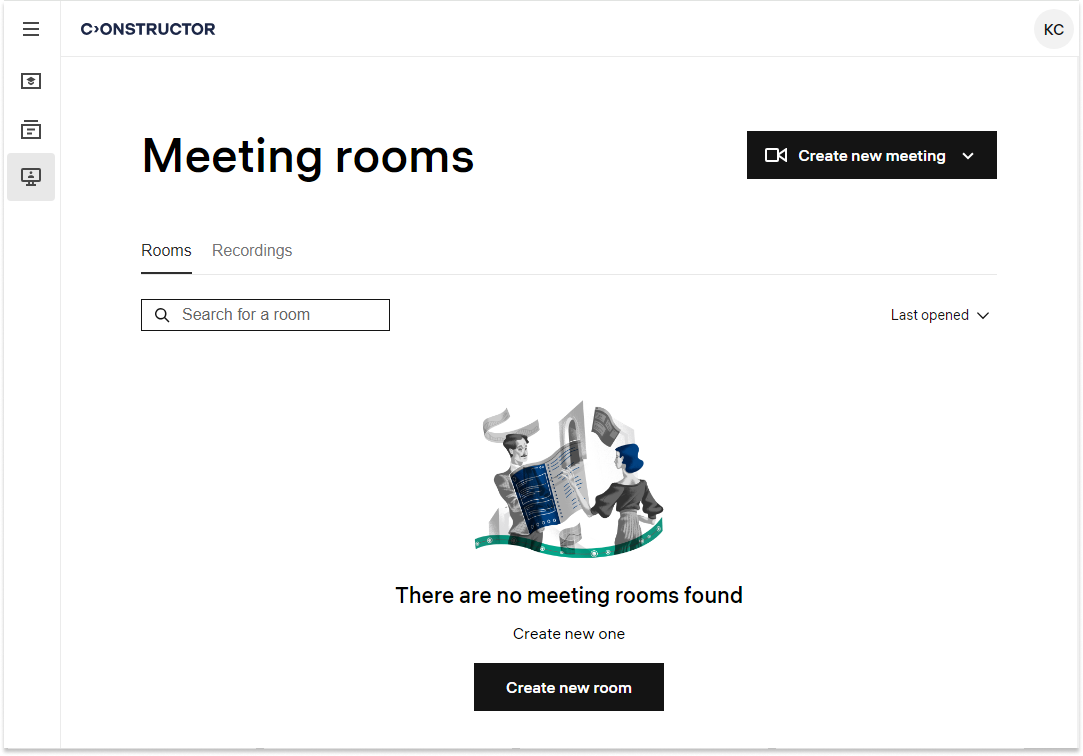
Step 2. Go to the Rooms interface
When you log in, you will see courses page, go to the left navigation panel and click Rooms. You will be redirected to the Classroom page with rooms.
Step 3. Create permanent room
You are in the rooms interface, here you can create instant meeting or permanent room.
- Instant meeting will open you a temporary room with a link that could be used multiple times, but you will not see this link further in the list of your rooms.
- Permanent room means that this room will have a title and agenda, and you will see it in the list of the rooms until you delete it manually.
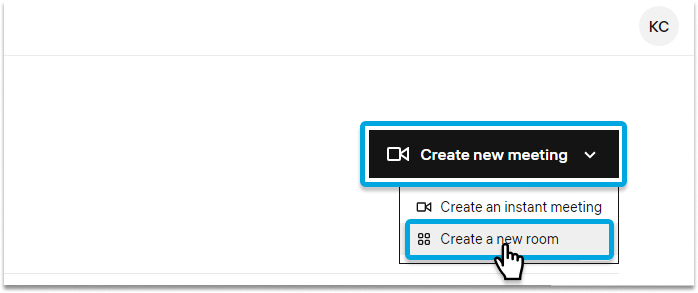
To create a room:
- Click Create new meeting > Create a new room.
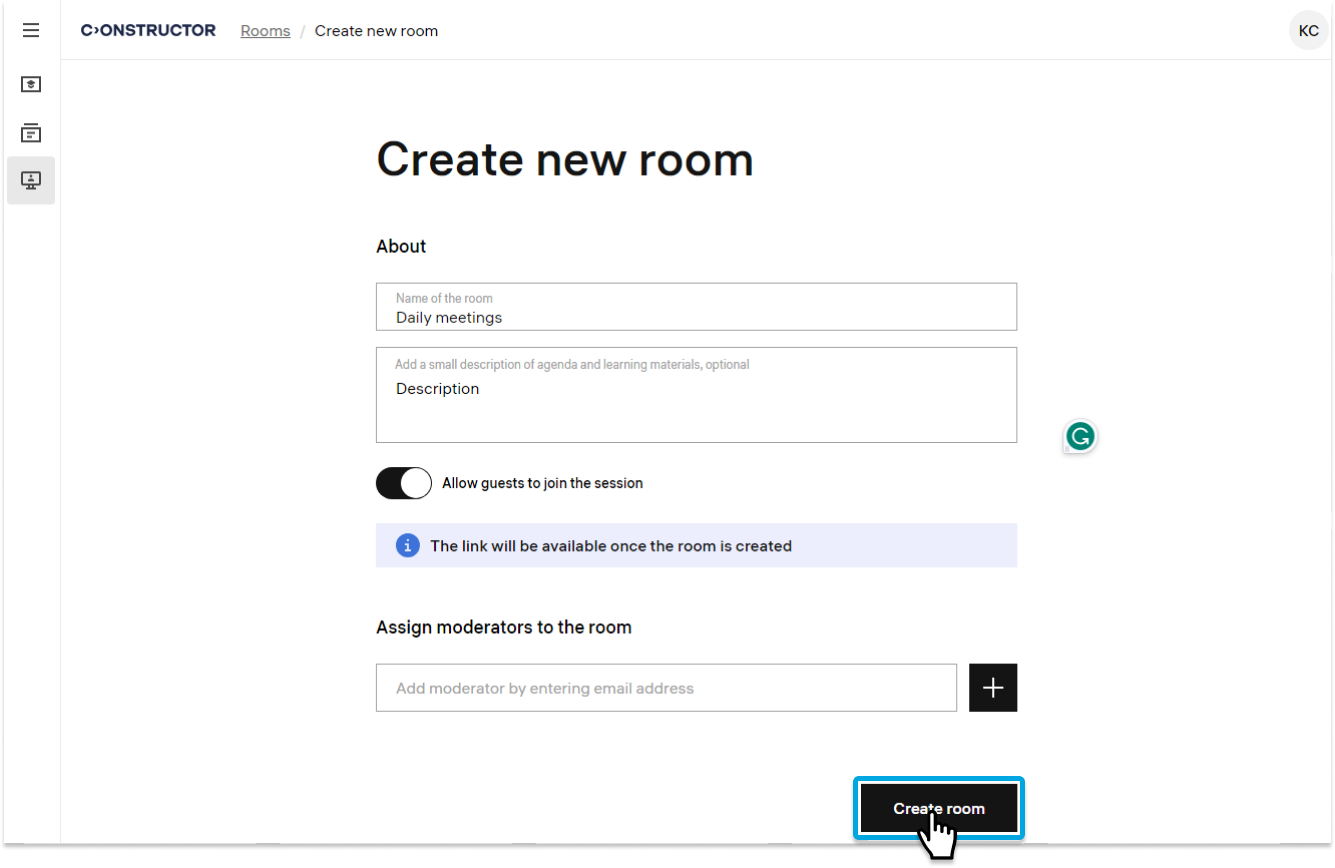
- Insert title and agenda and press Create room to generate unique link and join the meeting.
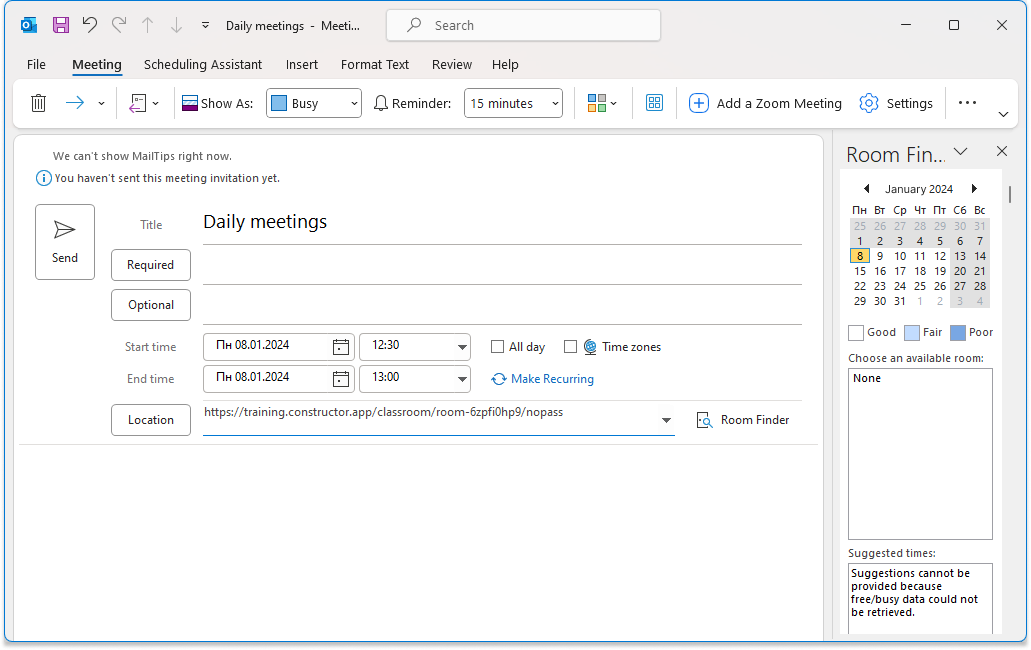
Step 4. Use a link in your calendar event
Once room is created, you can now copy permanent link and add it to any calendar event.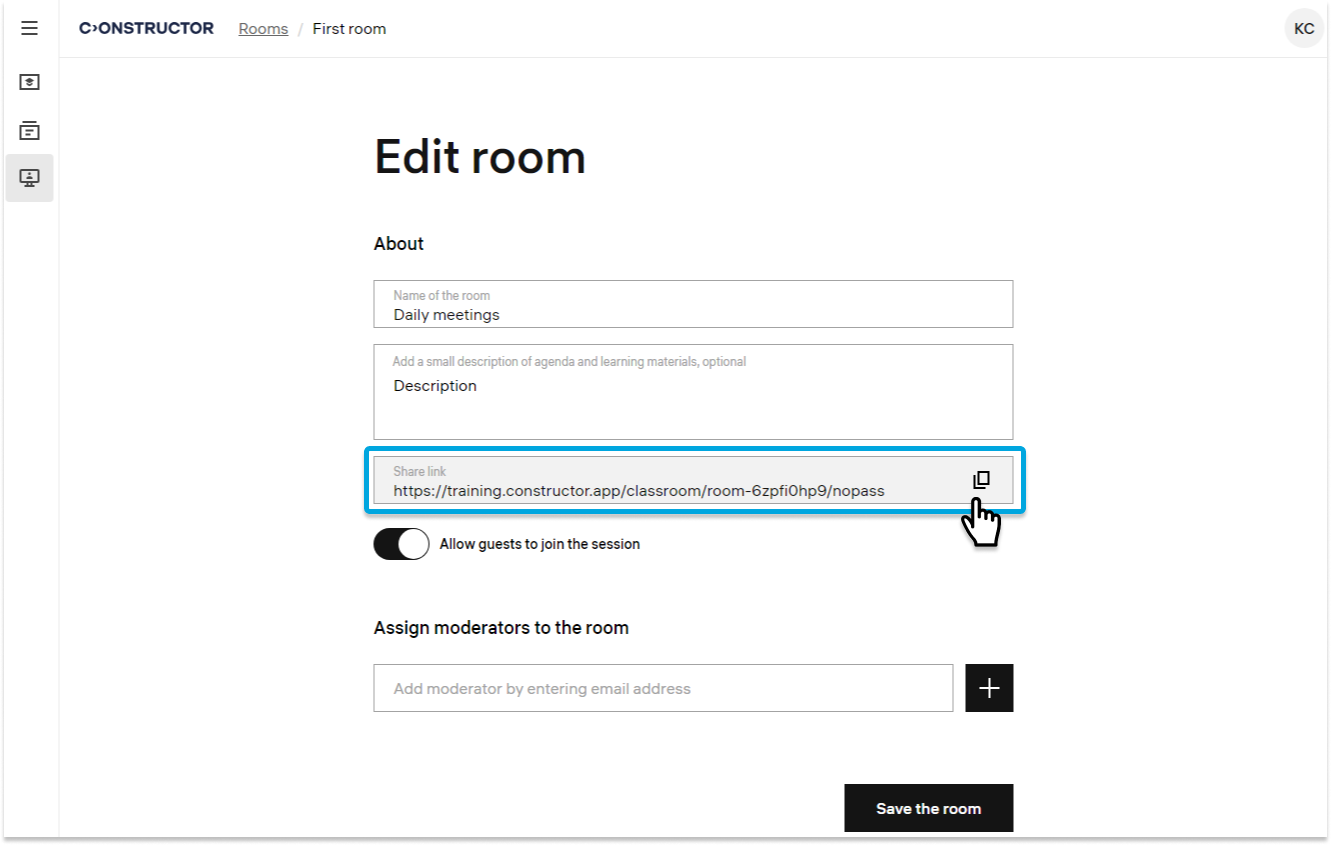
Open your mail client and create new event, use the room link as a location for your new event.
Step 5. Manage the room
Edit or copy the link to your room you can on the Rooms page, all permanent rooms will be available here. You can join the meeting from this page and add an additional moderator in the room settings.
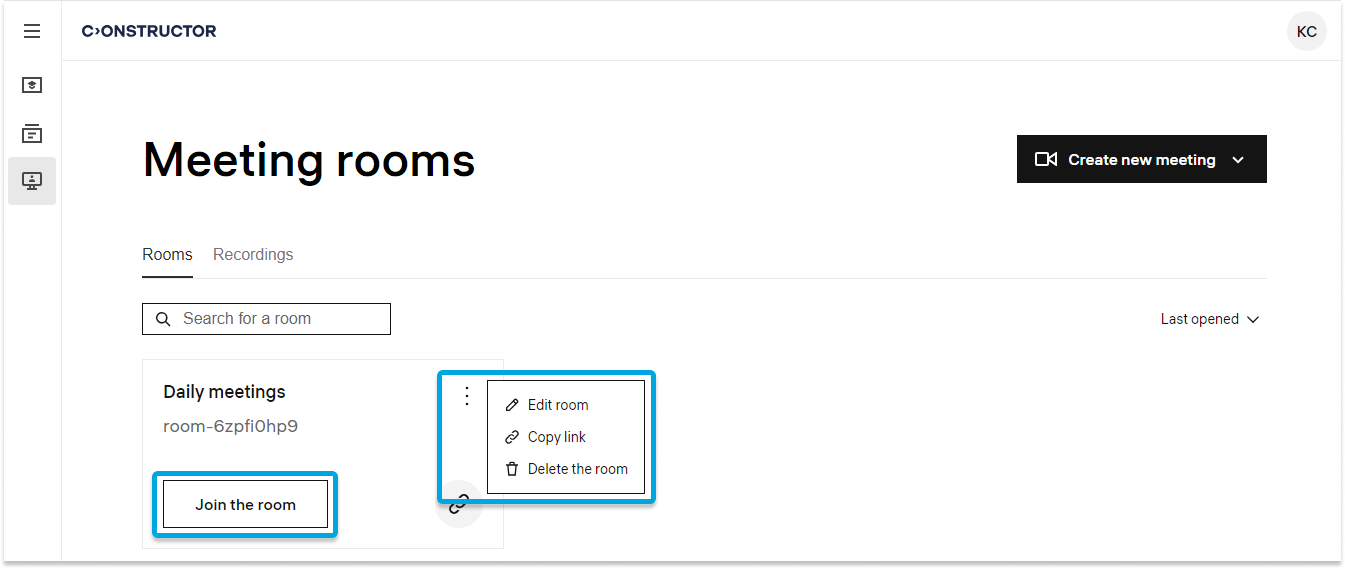
Step 6. Join the meeting
Click Join the room for enter the meeting in the room immediately.
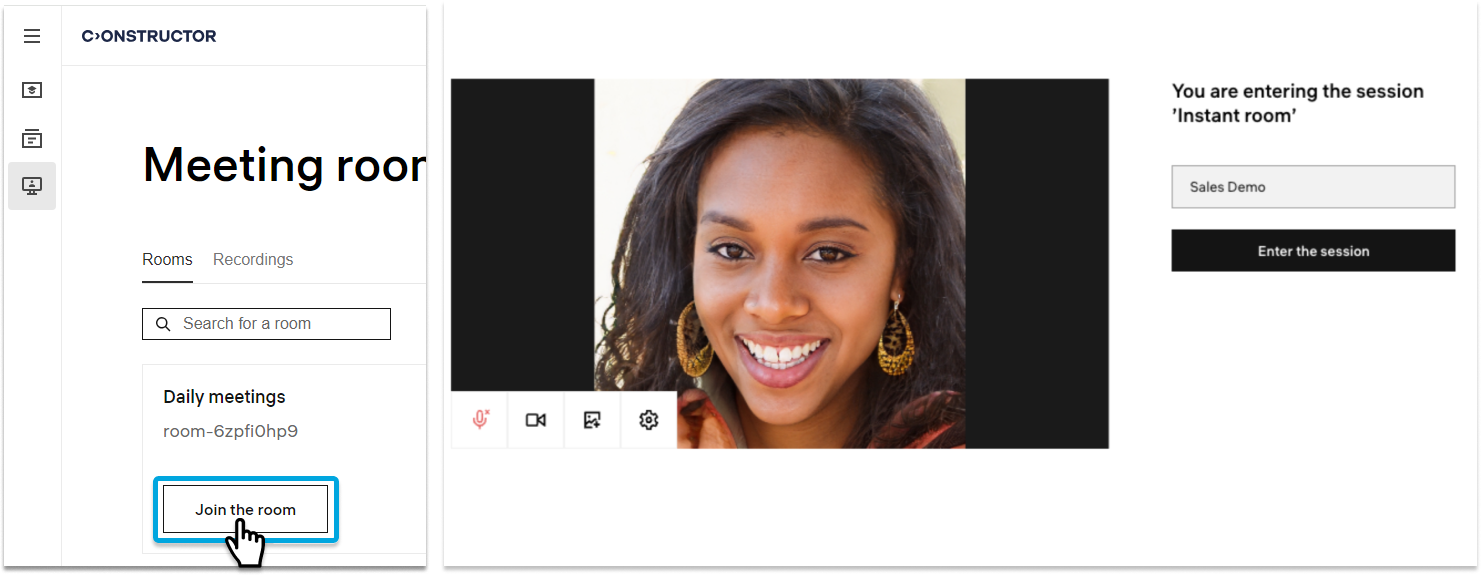
Step 7. Set up conference environment before the meeting
Click setting icon to set up audio and video devices, choose picture icon to set background or blur it.
You can choose audio input/output device and physical or virtual video camera.

Step 8. Enter the meeting
When you are ready, click Enter the session to enable the online meeting. If the meeting is public, any person with the link can join it even if it is not a Constructor user.
Wait for participants, copy the link from the button, or click more and copy link from there.
Share link in any channel of any messenger: private or public.
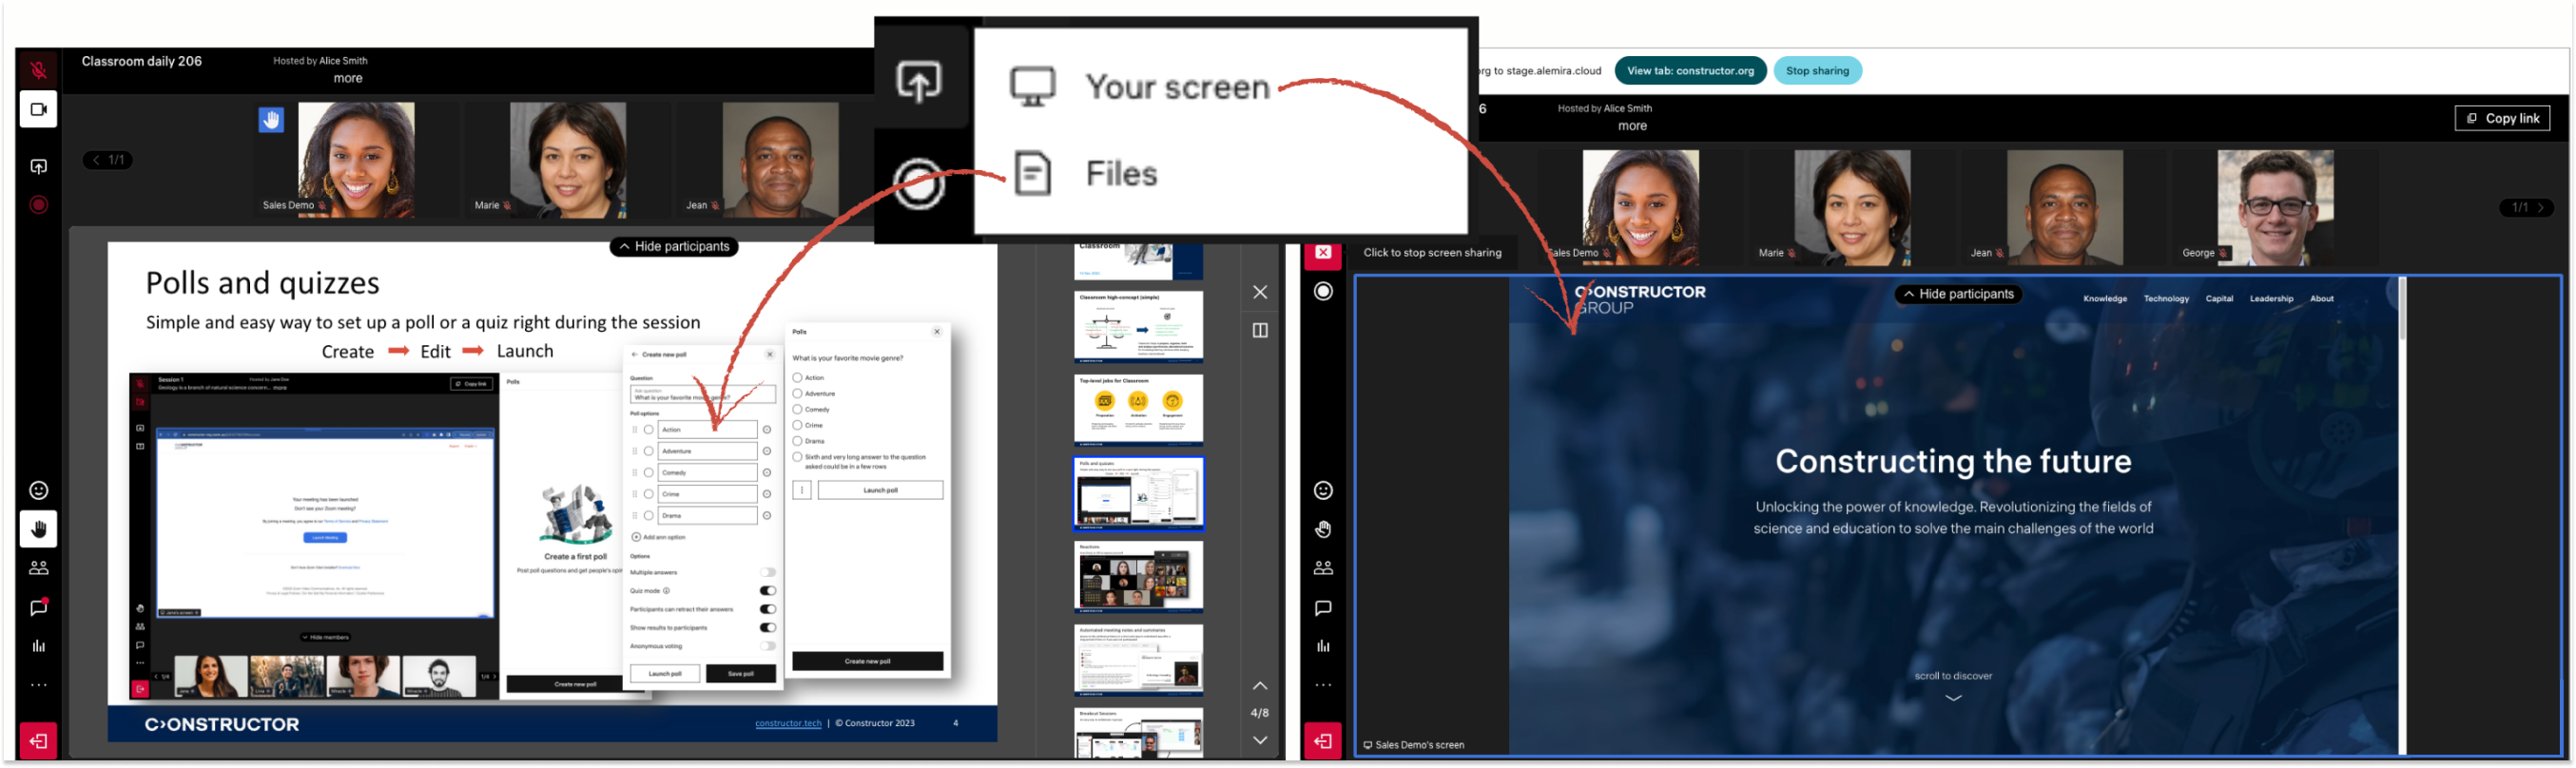
Step 9. Document and screen sharing
Click sharing screen icon and choose document or screen sharing.
- Document sharing
Choose “Files” to share document in PDF format. File will be uploaded to the server and available to all participants in asynchronous mode, host manage main flow, but each participant can switch slide and then turn back to the host - Screen sharing
Choose “Your screen” to share Entire screen, window or separate tab. When you choose tab, you can also share a sound from this tab, it might be useful if you share a video from the host service for ex. Youtube.
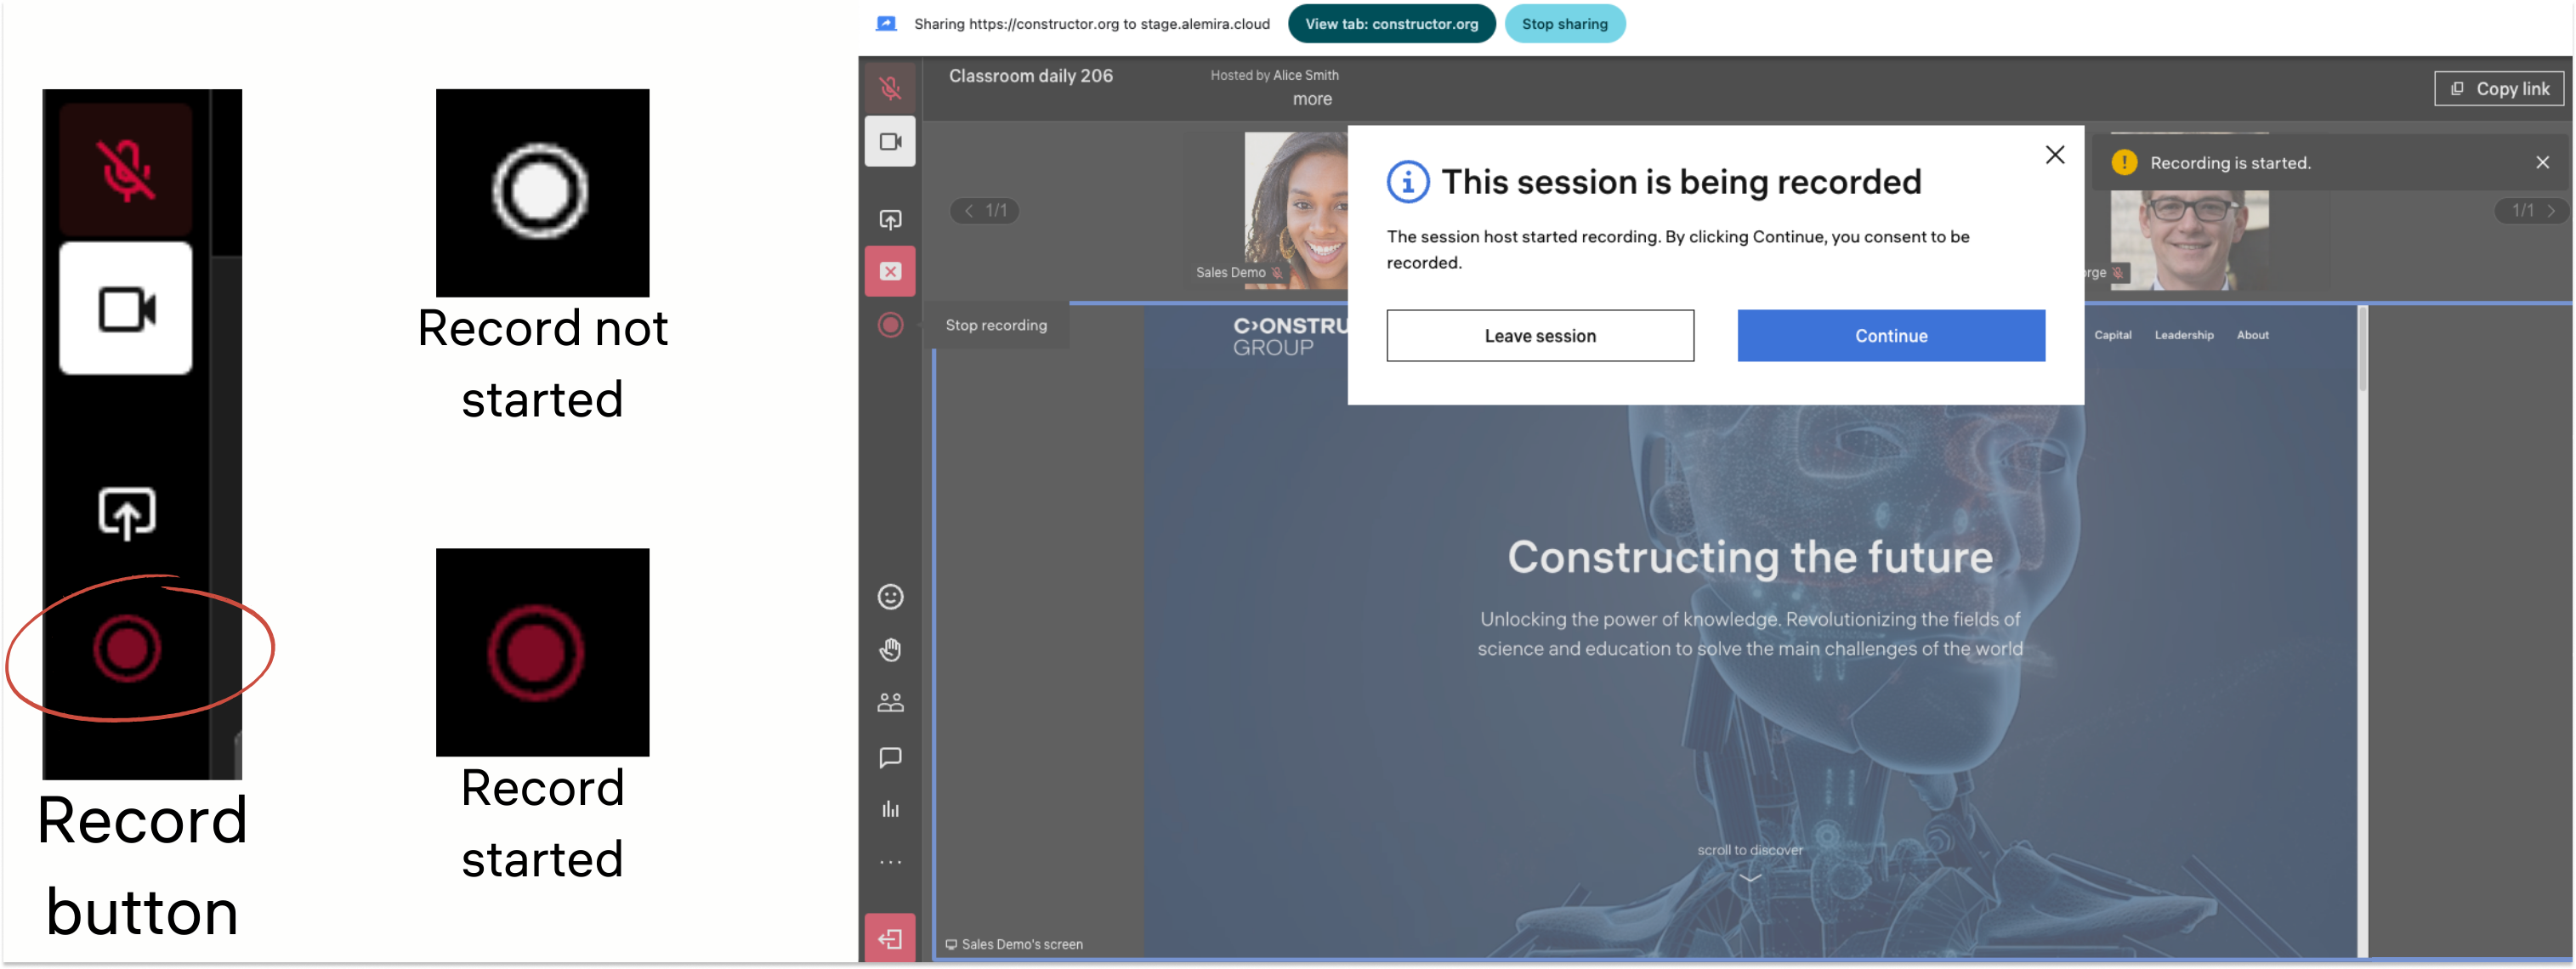
Step 10. Record the meeting
Press record button to start the meeting, participants will be notified about recording has started.
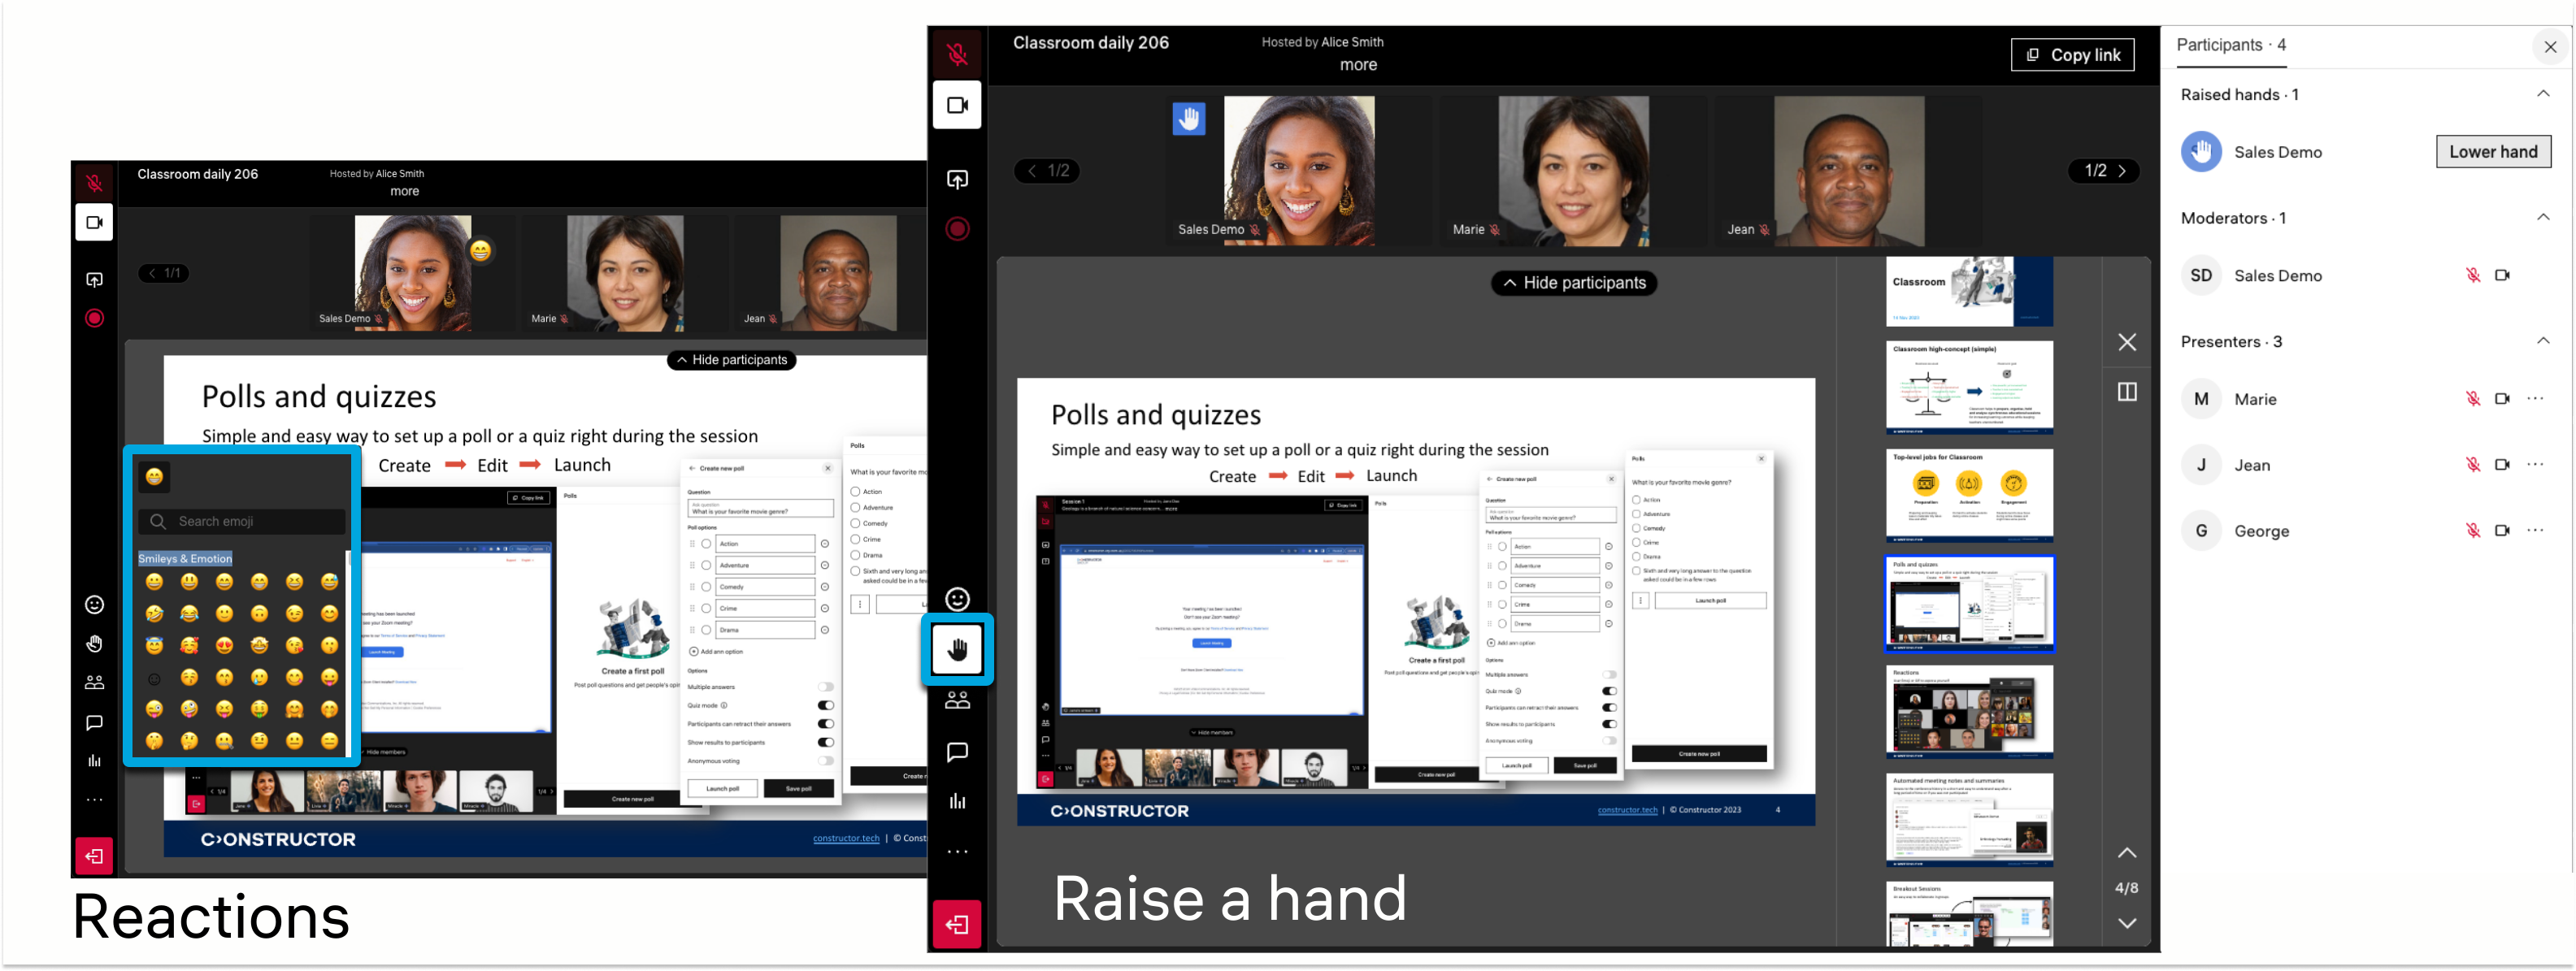
Step 11. Reactions and raise a hand
To collaborate with mates you can use reactions and raise a hand. Raised hands shown in the separate queue.
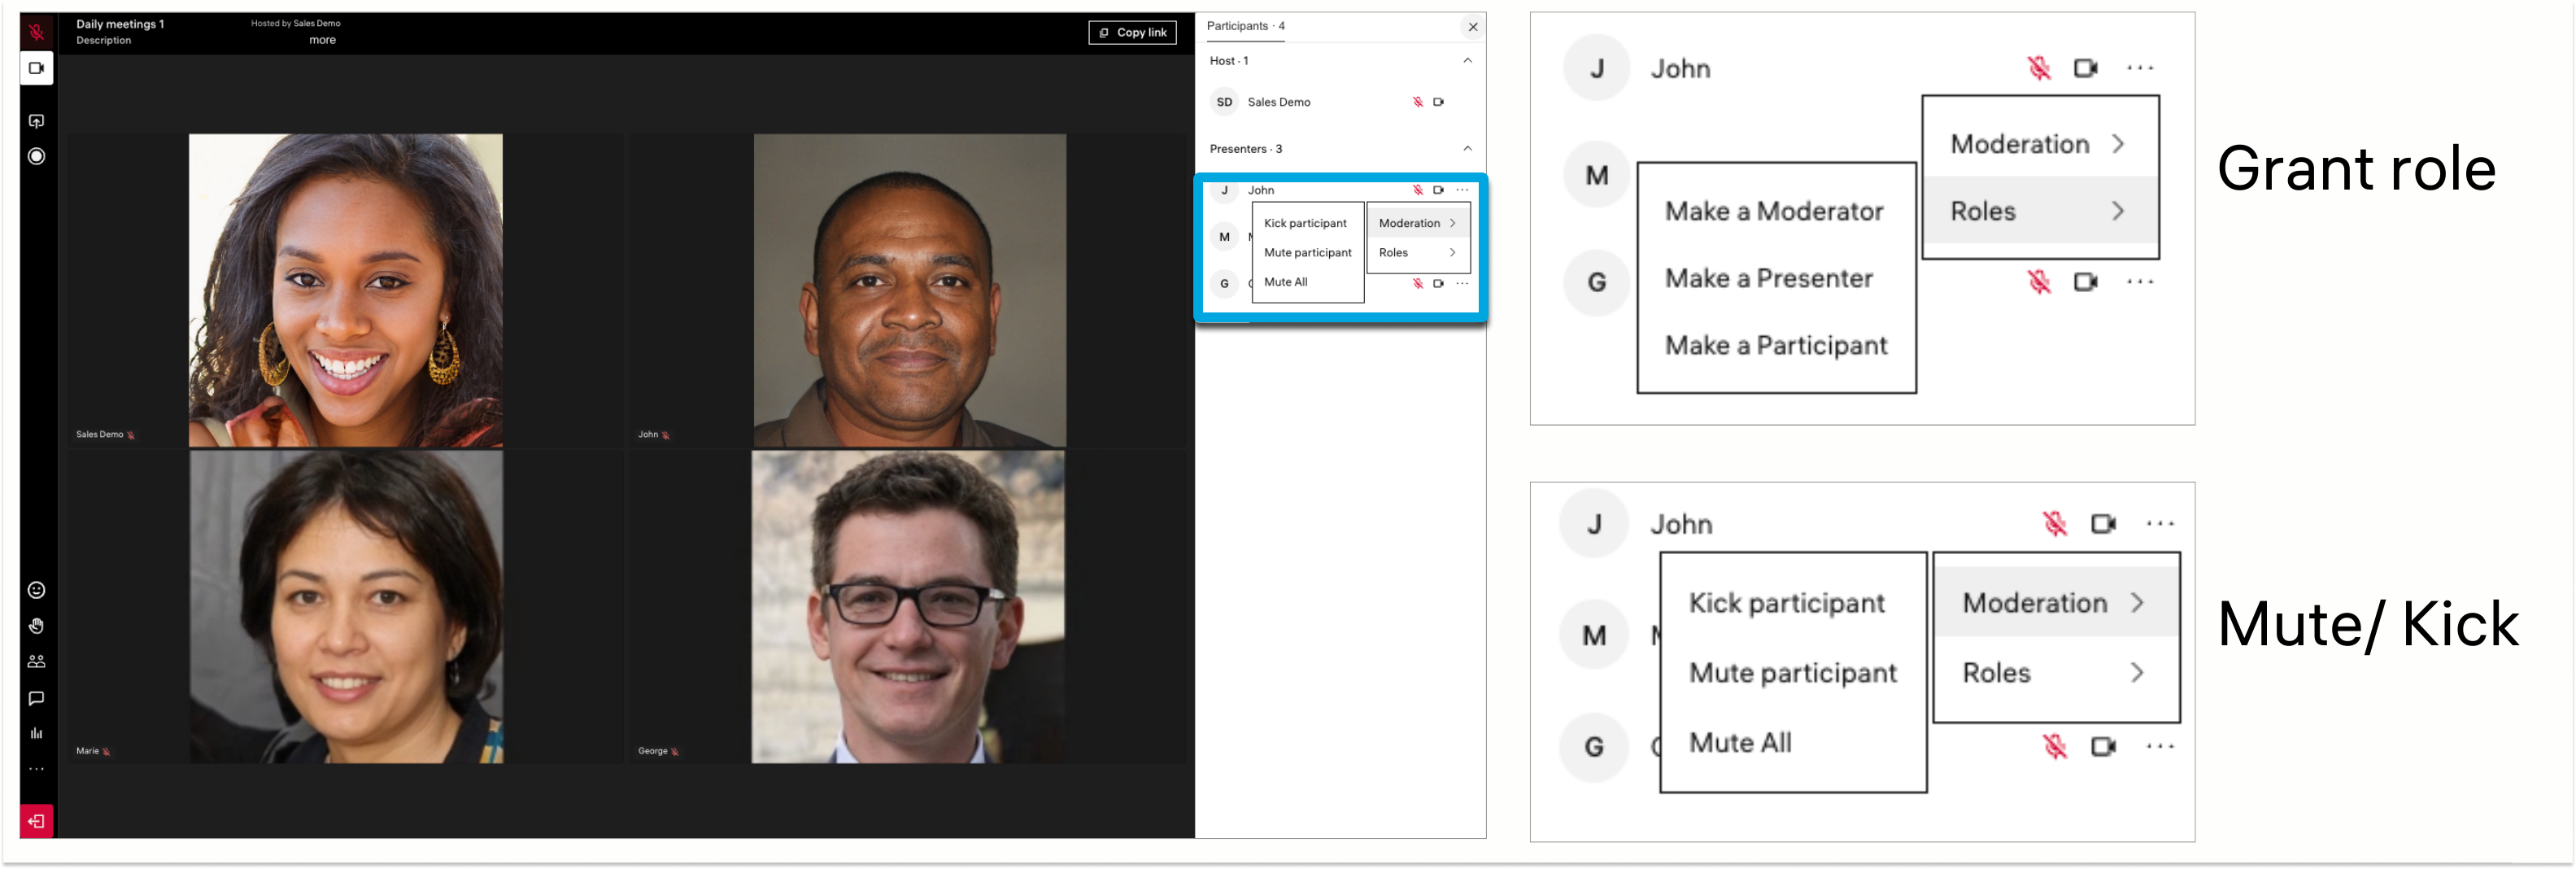
Step 12. Manage participants
In the participants list you can grant a role: moderator, presenter, participant. Or mute participant or even kick him from the meeting.
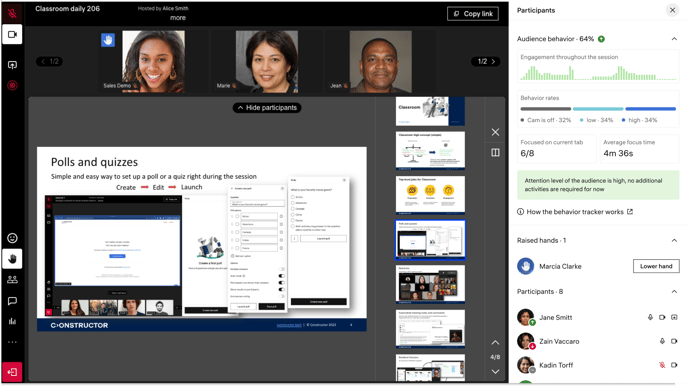
Step 13. Audience attention statistic data
Follow the average attention audience level and info about does participant focused on the Classroom window or not.
You can find more information in this article Audience attention.
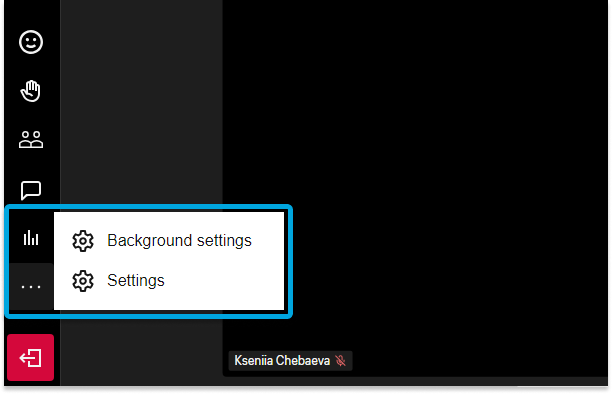
Step 14. Settings and background
If you want to switch audio or video device, click three dots > Settings and choose other device as current.
If you want to change, blur or set background, click Background settings. Background will be visible when you turn your camera on.
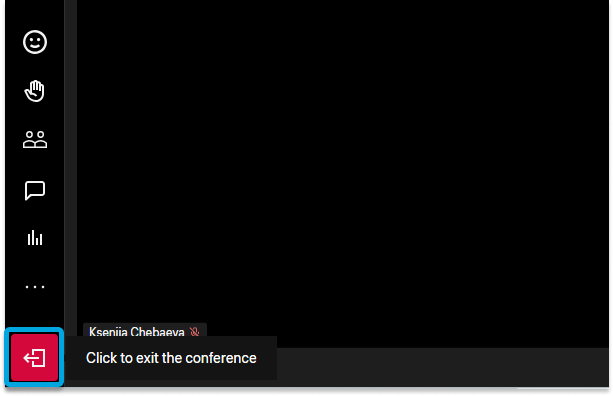
Step 15. Stop record and leave
Click record button to stop recording or click Leave the meeting. If you are the last participant, you can close the tab, recording will stop automatically.
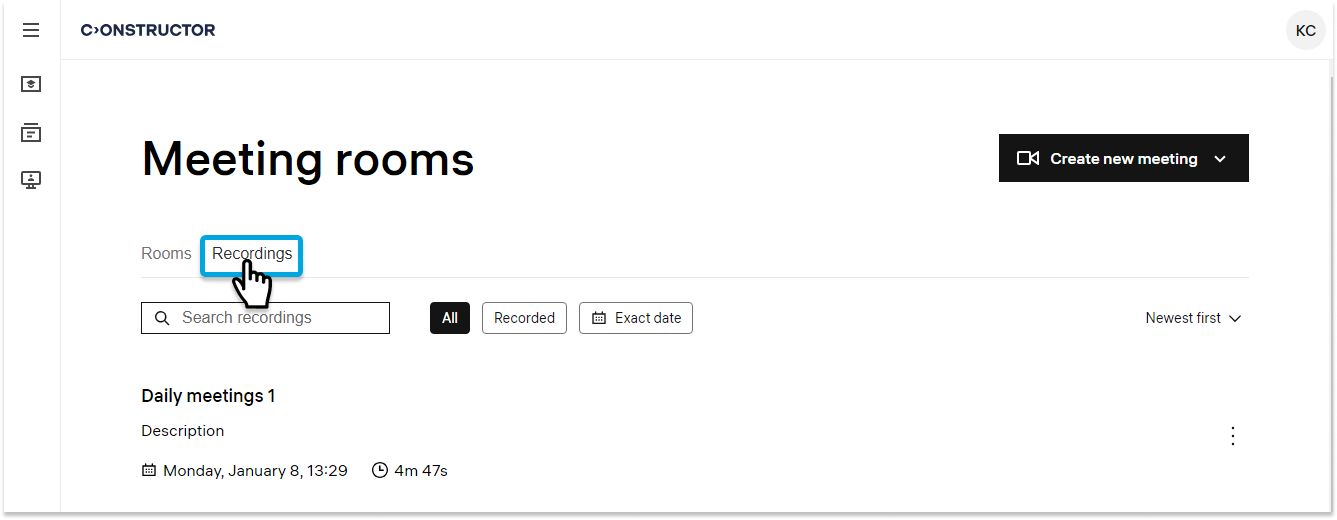
Step 16. Recordings
Go back to Rooms > Recordings. Click this tab to see all meetings that was finished no matter do you record it or nor. If you record it, the recording will have a video inside, if not, only general info and participants list.
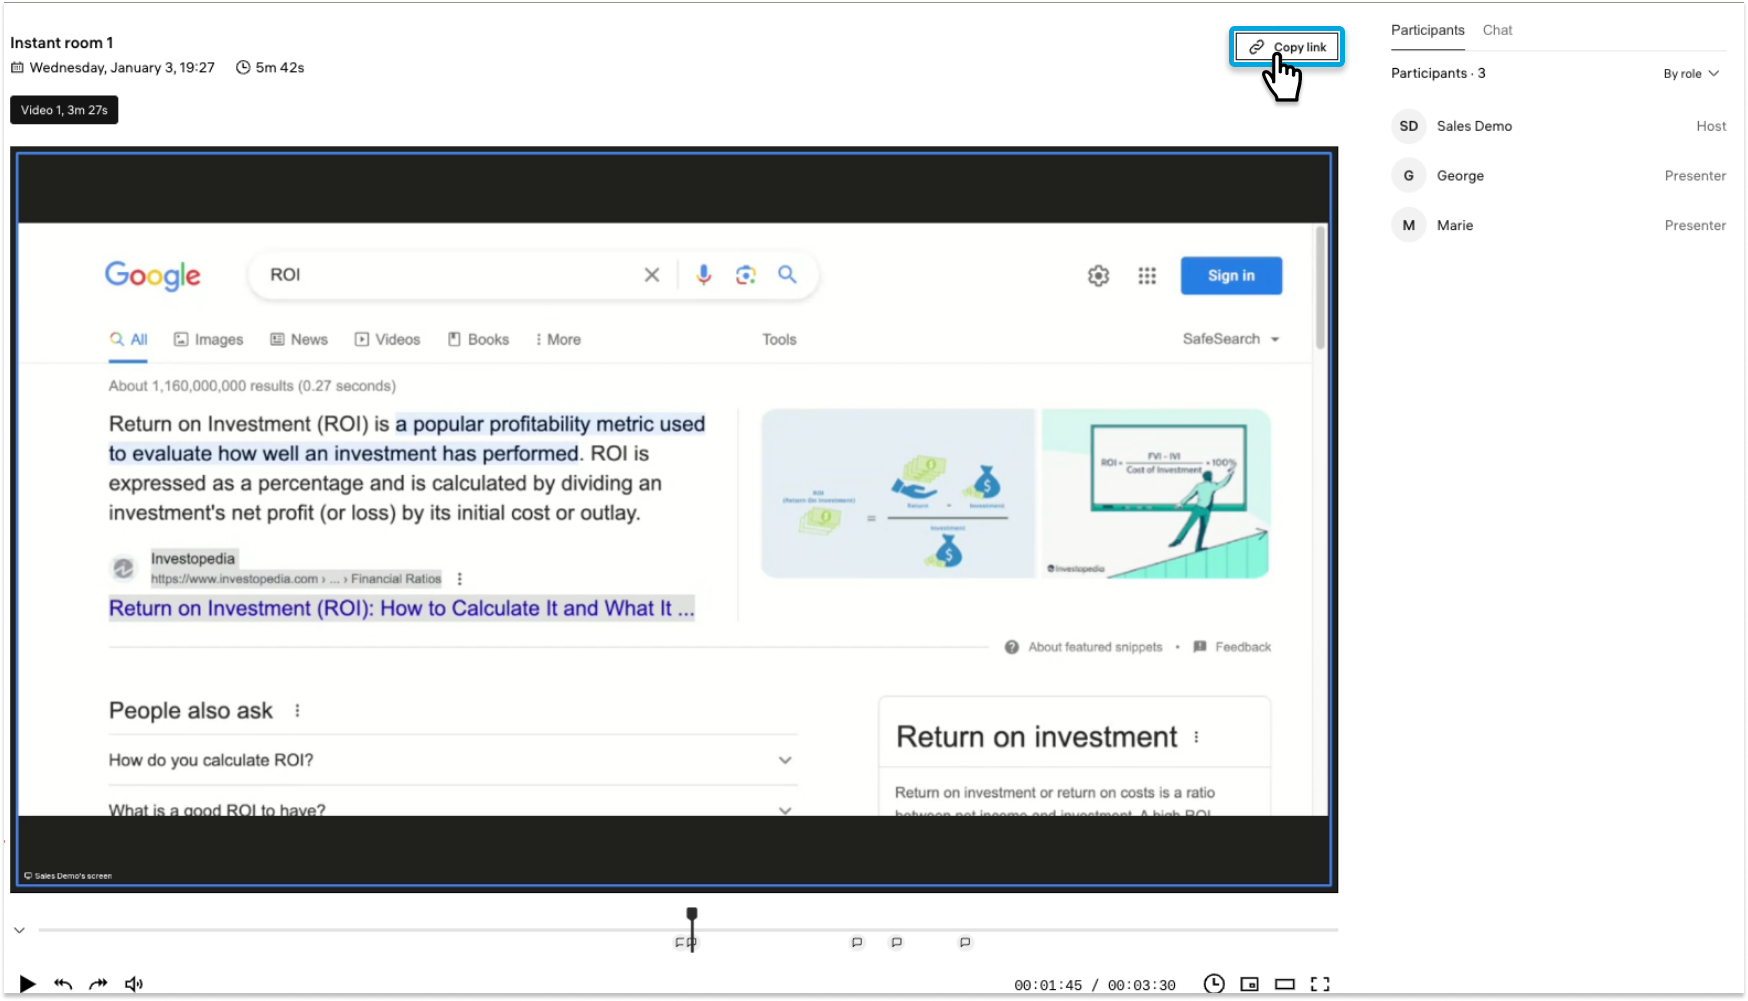
Step 17. Video
Click to the recorded meeting to go to the video player interface.
Here you can see the timeline and play, rewind or pause video. In the right panel there are participants list and chat history, this information available even if the meeting was not recorded.
If you want to share the video, click Copy link. You can share video only with authorized users.